 Garden

Affiliate Disclosure
Some links on this page are affiliate links. As an Amazon Associate, we earn from qualifying purchases — at no extra cost to you. We do not buy, test, or physically handle the products we cover; our rankings come from aggregated owner reviews, ratings and expert consensus. Commissions never change our verdicts. How we rank · full disclosure.
The short answer: five moves do almost all of the work, and all five can be done in one weekend for a few hundred dollars. Cut a crisp edge on every bed. Refresh mulch to an even 2 to 3 inches. Hard-prune or remove anything swallowing the front of the house. Widen and define the walkway. Add light along that walkway. Do those in order and the property reads differently from the street before Monday.
Curb appeal is not really about spending. It is about legibility — whether a stranger driving past can immediately read where the door is, where the beds end and the lawn begins, and whether anyone is paying attention. Overgrown, blurry, unlit front yards fail that test regardless of how much was originally spent on them.
We are a research desk rather than a test lab and we never buy or physically handle the products we mention; recommendations come from aggregated owner reviews and expert consensus, set out in how we rank. For the wider project, start at the landscaping and hardscaping hub.
Move 1: Cut a Crisp Edge on Every Bed
This is the highest-value hour in the entire yard and it costs nothing but effort. A defined boundary between lawn and mulch is what makes planting look deliberate. Without it, grass creeps in, mulch washes out, and the bed shape blurs into a vague smear that no amount of new plants can fix.
Use a half-moon edger or a sharp flat spade. Cut a vertical face on the lawn side about 4 inches deep, then slope the bed side up to it so the trench cross-section looks like a shallow V with one straight wall. That V is what stops grass rhizomes from crossing and gives mulch somewhere to sit. Work with a garden hose laid on the ground as your guide line for curves — you will get a smoother arc than freehand every time.
Cut edges need re-cutting once or twice a season. If that sounds tedious, install physical edging instead: it holds the same line for years and lets you mow right up to it. The install method, including the angled-spike trick that keeps edging from heaving out over winter, is in how to install landscape edging, and the ranked field is in best landscape edging.
Move 2: Get Mulch Depth Right — 2 to 3 Inches, Evenly
Mulch is the cheapest visual upgrade per dollar in landscaping, and the two numbers that matter are depth and consistency. Two to three inches suppresses most weed germination, holds soil moisture, moderates root temperature and gives beds a uniform dark background that makes foliage pop. Less than 2 inches does none of that reliably. More than 4 inches starts to hold too much water against stems and can shed rain rather than absorb it.
To estimate quantity: one cubic yard covers roughly 100 square feet at 3 inches deep, or about 160 square feet at 2 inches. A standard 2 cubic foot bag covers about 8 square feet at 3 inches. For a front yard with 300 square feet of beds you are looking at roughly 3 cubic yards, or around 40 bags — which is the point at which bulk delivery becomes cheaper than bagged.
Two rules save a lot of grief. Never pile mulch against trunks or stems; volcano mulching around trees traps moisture against bark and invites rot and rodents. Pull it back 3 to 4 inches from anything woody. And skip landscape fabric under mulch in planting beds — weed seed germinates in the decomposing mulch layer above it, roots straight through, and three years later you are cutting slits in brittle plastic every time you want to add a perennial. Fabric earns its place under gravel, not under bark.
Move 3: Cut Back What Is Eating the House
Foundation shrubs planted at nursery size in 1998 are now 8 feet tall and covering the windows. This is probably the most common curb appeal problem in American front yards, and the fix is subtractive rather than additive.
The guideline worth remembering: nothing planted against the house should mature taller than the bottom of the first-floor windows, and nothing should sit closer than half its mature spread to the wall. Shrubs that violate both are candidates for removal rather than pruning, because repeatedly shearing an oversized plant into a smaller box produces a dense outer shell with a dead, twiggy interior.
Some plants renovate well. Overgrown boxwood, holly, privet, forsythia, spirea and yew can take a hard rejuvenation cut back to 12 to 18 inches in late winter and will push new growth from old wood. Junipers, most conifers and false cypress will not — they do not regenerate from bare wood, so cutting into the brown zone leaves a permanent hole. When in doubt with a conifer, remove and replace rather than reduce.
Timing is simple enough: prune spring-flowering shrubs right after they bloom, and everything else in late winter while dormant. Sharpen the tools first, because torn cuts heal slowly and look bad up close.
Move 4: Widen and Define the Path to the Door
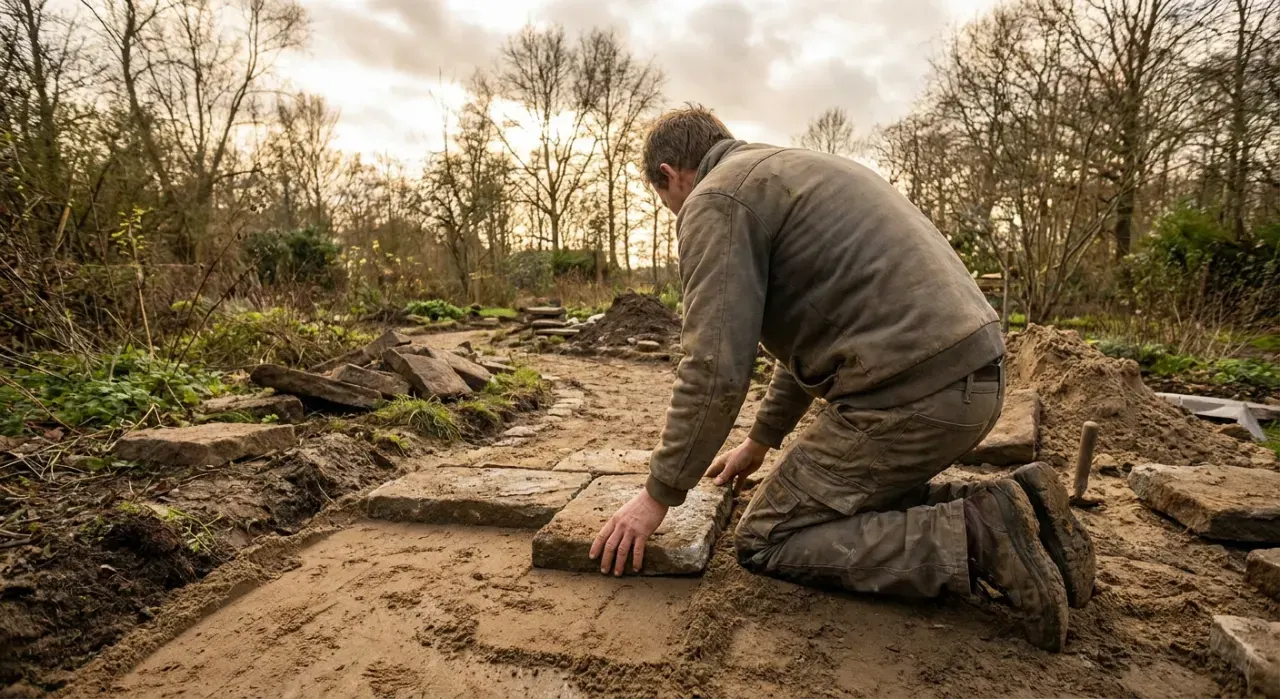
Builder-standard walkways are 36 inches wide, which forces two people to walk single file. Four feet is the width that feels like a real entrance, and 4.5 to 5 feet is generous. If replacing the walk is out of budget, you can fake the effect: run a 12-inch band of gravel, brick or paver soldier course down each side of the existing concrete, or plant a low, tidy border along both edges so the visual width reads wider than the poured surface.
Shape matters as much as width. A path should go where people actually walk. If there is a worn strip of dirt cutting the corner of your lawn between the driveway and the door, that is not a lawn problem, that is a design instruction — put the path there. Curves need a reason to curve; a bend around a tree or a grade change looks intentional, while a bend in open flat lawn looks like a mistake.
If you are building rather than modifying, a compacted base is what determines whether the surface stays flat. Four inches of compacted crushed stone under an inch of bedding sand is a reasonable minimum for a walkway, and 6 to 8 inches for anything in a freeze-thaw climate. The full method is in how to lay a paver patio, and if gravel is the budget answer, gravel vs mulch for paths covers how each ages.
Move 5: Light the Walkway and the Number
Half the time anyone sees your front yard, it is dark. A yard that reads beautifully at 2pm and disappears at 7pm is only half-finished, and lighting is the cheapest way to buy the second half.
Three fixtures do nearly everything. Path lights every 6 to 8 feet along the walk, staggered rather than lined up like a runway. One or two uplights on a specimen tree or an architectural corner. And a genuinely legible house number, lit or reflective, which matters for guests, delivery drivers and emergency services. Solar has improved enough to be worth considering in full-sun locations; in shade or under trees, low-voltage wired fixtures are still far more reliable, and owners consistently report that cheap solar path lights fade badly by their second season.
Aim for restraint. Overlit front yards look like car dealerships. Warm color temperature around 2700K, fixtures pointed down or across rather than out at the street, and gaps between pools of light rather than continuous glare.
The Weekend Order of Operations
| Time | Job | Rough materials cost |
|---|---|---|
| Saturday morning | Prune, remove overgrown shrubs, haul debris | $0 to $60 disposal |
| Saturday afternoon | Cut all bed edges, install edging if using | $3 to $8 per linear foot |
| Sunday morning | Weed, then spread mulch to 2 to 3 inches | $40 to $60 per cubic yard bulk |
| Sunday afternoon | Widen or border the walkway, set path lights | $40 to $250 |
Doing it in this order matters. Pruning first creates debris that would otherwise land on fresh mulch. Edging before mulching gives the mulch a defined container. Lighting last means you are placing fixtures against the finished layout rather than guessing.
What Goes Wrong
Buying plants first. Nurseries are seductive and a cart of one-of-everything is how front yards end up looking busy. Decide the shapes and the repetition first, then buy multiples.
Mulching over weeds. Mulch suppresses germinating seed, not established perennial weeds. Bindweed, nutsedge and quackgrass come straight back through. Clear them first.
Ignoring the grade. If water sits along the foundation after rain, no amount of mulch fixes it and your new plants will drown. Soil should fall away from the house roughly 6 inches over the first 10 feet. Fix that before planting — see fixing yard drainage.
Scale mismatch. A 2-story house with knee-high foundation plantings looks unanchored. Larger houses need bigger plant masses and wider beds, not more small things.
Forgetting the mailbox and driveway edge. Both are in every photo of the front of your house, and both are usually the last things anyone touches.
The Verdict
Curb appeal responds to clarity far more than to spending. Crisp edges, even mulch, plants kept in scale with the building, a walkway wide enough for two people and enough light to read the house at night will change how a property is perceived more than a few thousand dollars of new planting ever will. It is a weekend, and most of the cost is mulch.
Next: keep those edges permanently with best landscape edging, plan the bigger picture in how to plan a yard layout, or check the numbers before you commit in what landscaping costs.