 Garden

Affiliate Disclosure
Some links on this page are affiliate links. As an Amazon Associate, we earn from qualifying purchases — at no extra cost to you. We do not buy, test, or physically handle the products we cover; our rankings come from aggregated owner reviews, ratings and expert consensus. Commissions never change our verdicts. How we rank · full disclosure.
Freestanding shelving gives the most capacity per dollar and needs no wall fixing. Wall-mounted shelving gives back the floor. Overhead racks reach volume nothing else can use. Most garages end up with all three: freestanding across the back wall for heavy items, wall-mounted down the side you park beside, and overhead racks for seasonal bins you touch twice a year. The costs are equally distinct — freestanding consumes floor area, wall-mounted depends entirely on the wall behind it, and overhead needs a ladder every time you want something.
The comparison in one table
| Freestanding | Wall-mounted | Overhead | |
|---|---|---|---|
| Capacity per dollar | Highest | Medium | Lowest |
| Floor space used | Full footprint | None | None |
| Typical per-shelf load | 250–1,000+ lbs | Moderate; fastener-limited | Whole-rack rating, often 250–600 lbs |
| Install difficulty | Assembly only | Stud location and drilling | Hardest — overhead, joists |
| Access | Immediate | Immediate | Ladder |
| Takes it with you | Yes | No | No |
| Renter-friendly | Yes | Rarely | No |
| Best for | Heavy, frequently used | Medium items along a parking wall | Bulky, seasonal, light-to-medium |
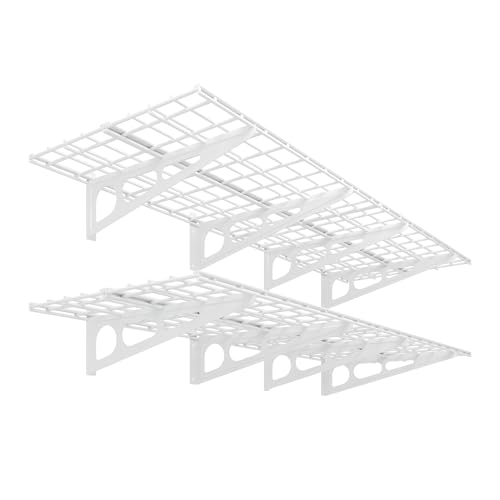
Best for keeping the floor completely clear along a wall you park beside
- Mounts into studs, so the wall carries everything
- Nothing touches the floor, which makes sweeping and parking easier
- Height is yours to choose, unlike a fixed freestanding unit
- Depth is limited by leverage — deeper is not automatically better
Why buy it: wall shelving buys back floor area you can actually park on, which in a single-car garage is worth more than raw storage capacity.

Best for the most capacity per dollar, in a rental or anywhere you cannot drill
- No wall fixing needed, so it moves when you do
- Adjustable shelf heights on a wire post system
- Highest capacity per dollar of the three approaches
- Should still be strapped to a stud at the top if it is tall
Why buy it: freestanding units are the only type that survives a move, which is why they dominate in rentals and first garages.

Best for bulky seasonal items you touch once or twice a year
- Uses ceiling space that no other system can reach
- Adjustable drop height to clear a garage door track
- Must go into the center of ceiling joists with the supplied hardware
- Access needs a ladder, so it suits seasonal storage only
Why buy it: the ceiling is the only genuinely unused volume in most garages, and a rack converts it without giving up a square foot of floor.
Freestanding: capacity per dollar
Four posts, four to five shelves, load straight down into the slab. Nothing else gives you as much storage for as little money, and nothing else is as forgiving of a garage where you do not know where the studs are or do not own the building.
Where it wins: heavy items — paint, tools, automotive fluids, bulk supplies — because the load path is a compression path through steel posts rather than a pull-out load on a fastener. It also wins on flexibility, since adjustable shelves let you reconfigure and the whole unit moves when you do.
What it costs you: the floor. A 48 by 24 inch unit takes eight square feet permanently, plus the standing room in front of it. In a single-car garage that is a meaningful fraction of the space you were trying to organize.
The safety point: anything over about five feet tall should still be strapped to the wall. A tall unit is stable when loaded low and evenly and becomes top-heavy the moment the heavy items go up high. One L-bracket into a stud takes ten minutes and removes the tip-over risk the CPSC has repeatedly flagged for tall storage furniture. The ranked field is in best garage shelving.
Wall-mounted: buying back the floor
Brackets or a track system into the studs, with nothing touching the ground. In a garage where you actually park, this is often the highest-value type despite carrying less than freestanding, because clear floor is what makes a garage usable.
Where it wins: the side wall you squeeze past to get out of the car, the wall behind the car’s nose, and anywhere you sweep or hose down. It is also the only type that lets you set the height — shelves at 5 feet clear the hood of a parked car while a freestanding unit in the same spot does not.
What it costs you: everything depends on the wall. Studs at 16 or 24 inches on center dictate where uprights can go, and depth is limited because the further out a shelf projects, the greater the outward pull on the top fasteners. Sixteen to eighteen inches deep is the practical band — see how deep garage shelving should be.
The critical detail: lag screws into the center of a stud, confirmed with a pilot hole, never drywall anchors. On a concrete or block wall, sleeve or wedge anchors sized well above the load. The full method is in anchoring into studs and concrete, and a build-it-yourself version in how to build garage wall shelving.

Overhead: the space nobody uses
A steel frame hung from the ceiling joists, typically 4x8 feet, with an adjustable drop so it clears the garage door track. It is the only way to reach the volume above head height, and in most garages that is the single largest unused space in the house.
Where it wins: holiday decorations, luggage, camping gear, seasonal sports equipment — bulky, light-to-medium, and needed once or twice a year. Mounted over the hood of a parked car or above the door, it costs nothing you were using.
What it costs you: access. Every retrieval is a ladder trip, and lifting a loaded bin overhead is awkward and is where injuries happen. It is also the hardest install of the three and the least tolerant of mistakes.
The safety points are not optional. Fasten into the center of ceiling joists, located with a stud finder and confirmed with a small pilot hole. Use the hardware supplied rather than substituting shorter lags. Keep heavy items near the mounting points rather than at the ends of the rack, where leverage is highest. Respect the drop height so the garage door and its track still clear. And check the fasteners after the first month and annually after that. If you cannot identify what is above the drywall — particularly in a truss-framed roof — get a professional to confirm before loading. The install walkthrough is in how to install garage overhead storage and the ranked field in best overhead garage rack.
Reading the ratings across types
The three types quote capacity differently, which makes direct comparison misleading.
- Freestanding quotes per-shelf capacity, sometimes alongside a total. The per-shelf number assumes an evenly distributed load across the full shelf area.
- Wall-mounted quotes a bracket or shelf capacity that assumes correct fixing into solid framing. Fix it into drywall and the published number means nothing.
- Overhead usually quotes a whole-rack capacity, and it assumes the load is spread across the deck rather than concentrated at one end.
In all three cases, derate for dynamic loads — anything you lift on and off regularly, or that gets knocked — and stay well below the headline figure. The full explanation is in shelf weight ratings explained.

What each type costs per cubic foot
Comparing sticker prices misleads, because the three types deliver different volumes. A rough sense of value, for a typical mid-range product in each category:
- Freestanding: a 48 by 24 inch five-shelf unit gives about 40 cubic feet of usable storage for well under $150. Cheapest by a clear margin, and no installation cost.
- Overhead: a 4x8 rack gives roughly 32 usable cubic feet for $180 to $250, plus an hour or two of installation. More expensive per cubic foot, but the volume is space you were not using at all.
- Wall-mounted: the most variable, because it depends on run length. A pair of 2x6 foot shelves gives about 24 cubic feet for $150 to $250 installed. The most expensive per cubic foot — and the only one that returns floor area.
Which is why the value ranking flips depending on the constraint. If the problem is not enough storage, freestanding wins outright. If the problem is that you cannot park the car, wall-mounted and overhead are worth every cent of the premium, because floor space is what you are actually buying.
Planning the mix
A practical layout for a typical two-car garage, in the order most people should buy:
- Freestanding on the back wall first, for heavy and frequently used items. It is the cheapest capacity and needs no drilling.
- Overhead over the parking bays second, for the bulky seasonal bins currently taking up floor space.
- Wall-mounted down the side wall third, once you know what still needs a home and where you actually walk.
- Vertical hanging last — pegboard, slatwall, bike hooks — for the long, awkward items that suit none of the above. See installing a garage pegboard and hanging bikes in the garage.
Then standardize on one bin size so everything stacks and interchanges between the three systems, and label the ends rather than the lids. The zone-by-zone method is in how to organize a garage.
We never buy, test or physically handle the products we rank. Every recommendation is drawn from aggregated owner reviews, star ratings, review volume and published expert consensus — see how we rank.
More from this hub: Storage & Organization · Shelf weight ratings explained · Anchoring into studs and concrete · How to organize a garage · How we rank